
How to Upload and Organize Documents in SharePoint
This guide explains how to upload, organize, and structure documents in Microsoft SharePoint Online to ensure consistent collaboration, easy navigation, and long-term maintainability.
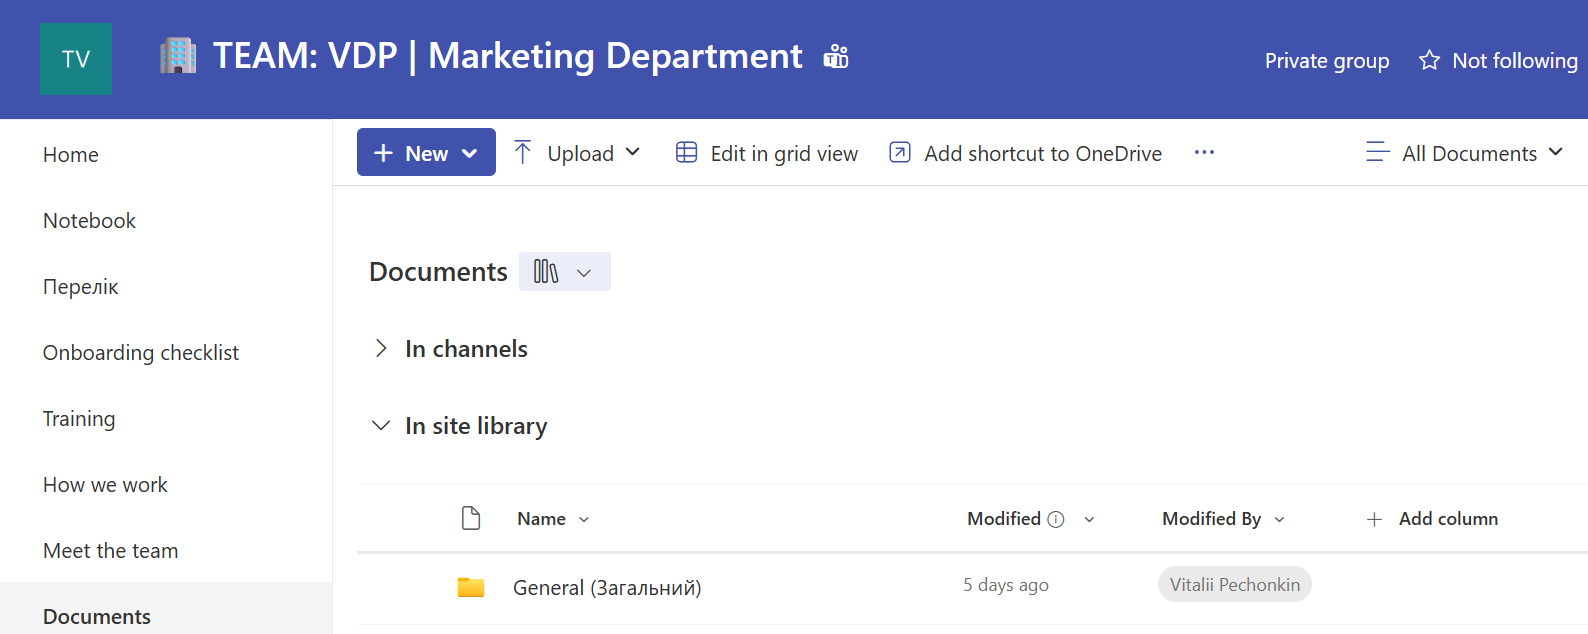
1. Where Documents Are Stored in SharePoint
Documents in SharePoint are stored inside: - SharePoint Sites - Document Libraries within those sites - Optional Folders inside libraries
Before uploading files, ensure you are working in the correct site and document library.
2. Upload Documents to SharePoint
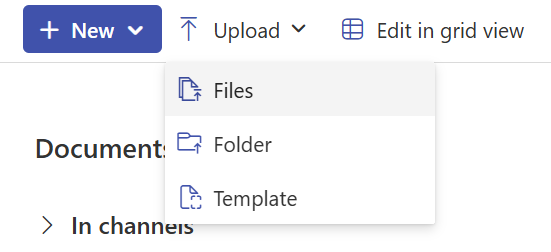
Upload Files
- Open the target Document Library.
- Click Upload.
- Choose Files.
- Select one or more files from your computer.
- Confirm the upload.
Upload Folders
- Open the target Document Library.
- Click Upload.
- Choose Folder.
- Select a folder from your computer.
- All files and subfolders will be uploaded.

Drag and Drop Upload
- Open the Document Library.
- Drag files or folders from your computer.
- Drop them into the browser window.
3. Create and Manage Folders
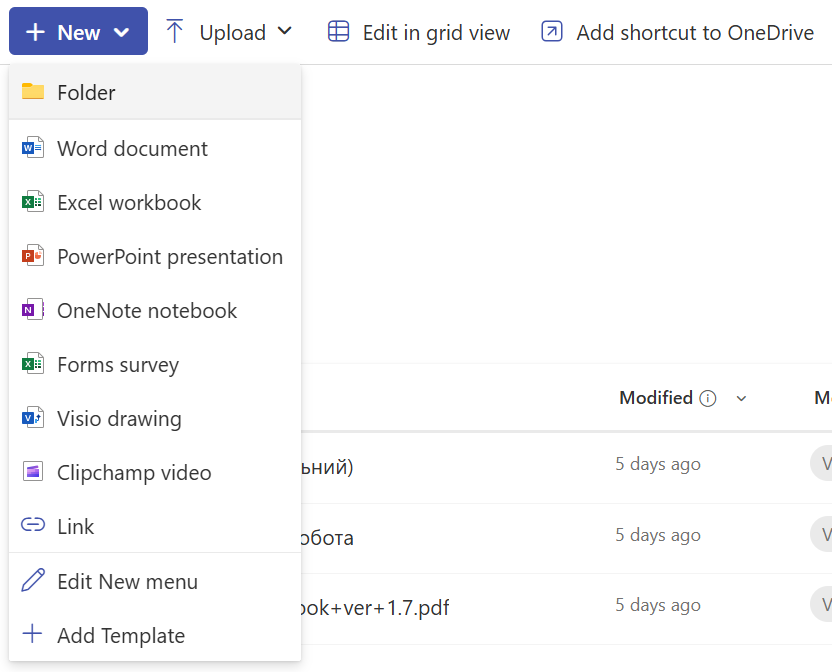
Create a Folder
- Open the Document Library.
- Click New.
- Select Folder.
- Enter a folder name.
- Click Create.
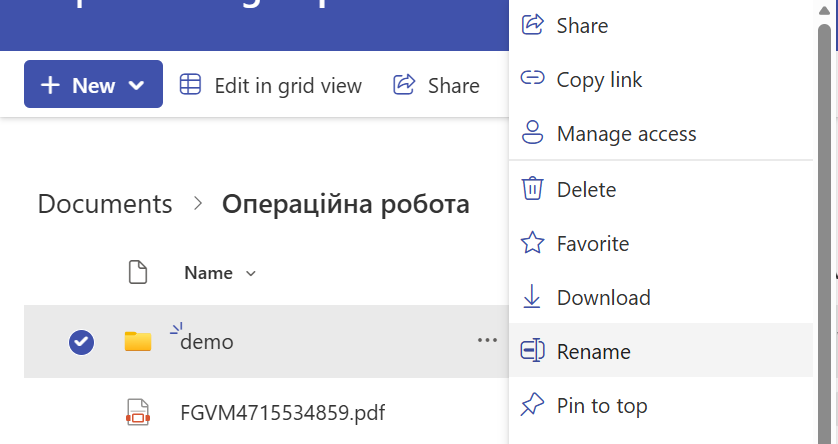
Rename or Move a Folder
- Select the folder.
- Choose Rename or Move to.
- Select the destination if moving.
- Confirm the action.
4. Recommended Folder Structure
Use a logical and consistent structure that reflects how teams work.